



English
Using Online Meeting Link
Step-by-step guide to creating a Teams meeting and copying its join information.
This guide explains how to create a Microsoft Teams meeting with Online Meeting Link and share its join information.
Before you start
- Online Meeting Link is available in your SharePoint or Teams context.
- You are signed in with the Microsoft 365 account that should create the meeting.
- Your account is allowed to create Teams meetings under its Microsoft 365 license and your organization’s policies.
- Your administrator has approved the required Graph permission.
The app creates the meeting as your signed-in account. It does not send invitations or create an Outlook calendar event. You need to share the join information with participants yourself.
Create a meeting
- Open Online Meeting Link or Teams-Besprechung.
- Enter a meeting name in Subject.
- Check the Start date, Start time, End date, and End time. Times are shown in your local time zone. By default, the start is set to the next quarter hour and the end is one hour later.
- Adjust the date and time if needed. The start must be in the future and the end must be after the start. Enter times in the 24-hour format. If the end date is before the new start date, it is moved to the same day. Otherwise it stays unchanged; the end time is never changed automatically.
- Select Save. Wait for the request to finish; do not click repeatedly while the meeting is being created. The result displays dates and times using the same native input types as the form, but the fields are read-only.
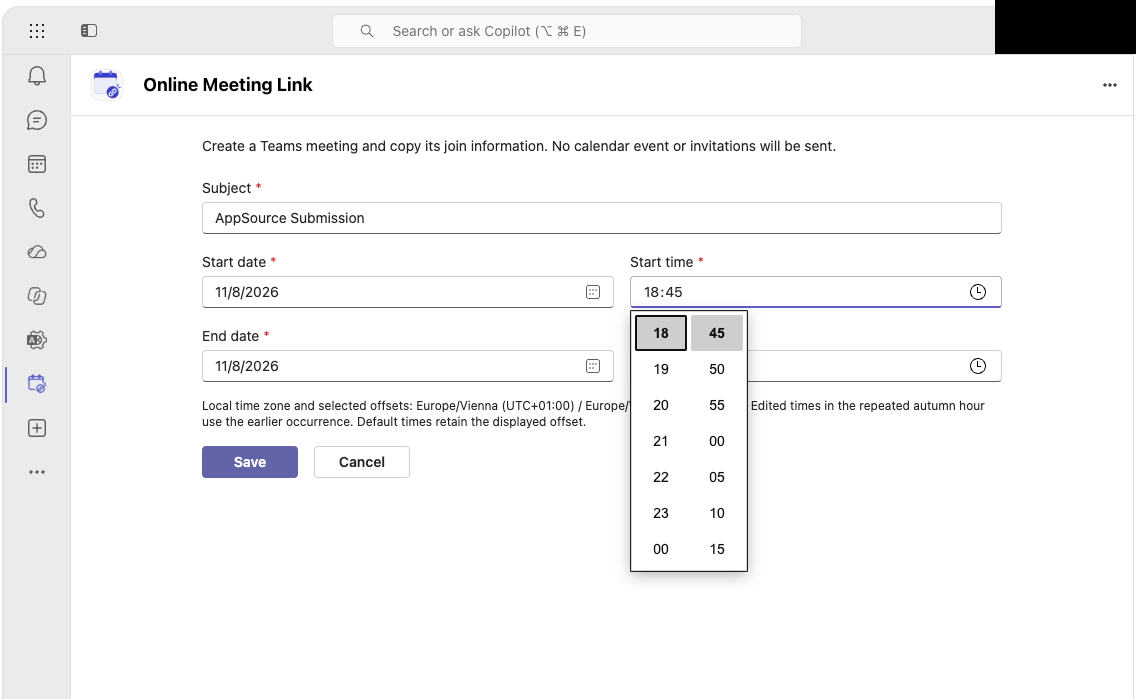
Set the subject, dates, and times before selecting Save.
Screenshots show example dates and subjects, not values to reuse. Account details and meeting access information are hidden in the documentation images.
If an entry is invalid, the app shows a message beside the relevant field or in the form. Correct it before saving again. The app rejects a start in the past, an invalid local time (for example, a clock time skipped by a daylight-saving change), or an end that is not after the start.
Copy the join information
After successful creation, the app shows a confirmation, the meeting details, and a join link.
- Review the displayed join information.
- Select either copy button above or below the join information. The web part headline is hidden in Teams.
- Paste it into the message or application you want to use, then check that the link is included before sending it.
The app copies the join information, including links and formatting, when supported by the browser. Otherwise, it copies plain text and lets you know. Success is shown only when copying actually succeeds.
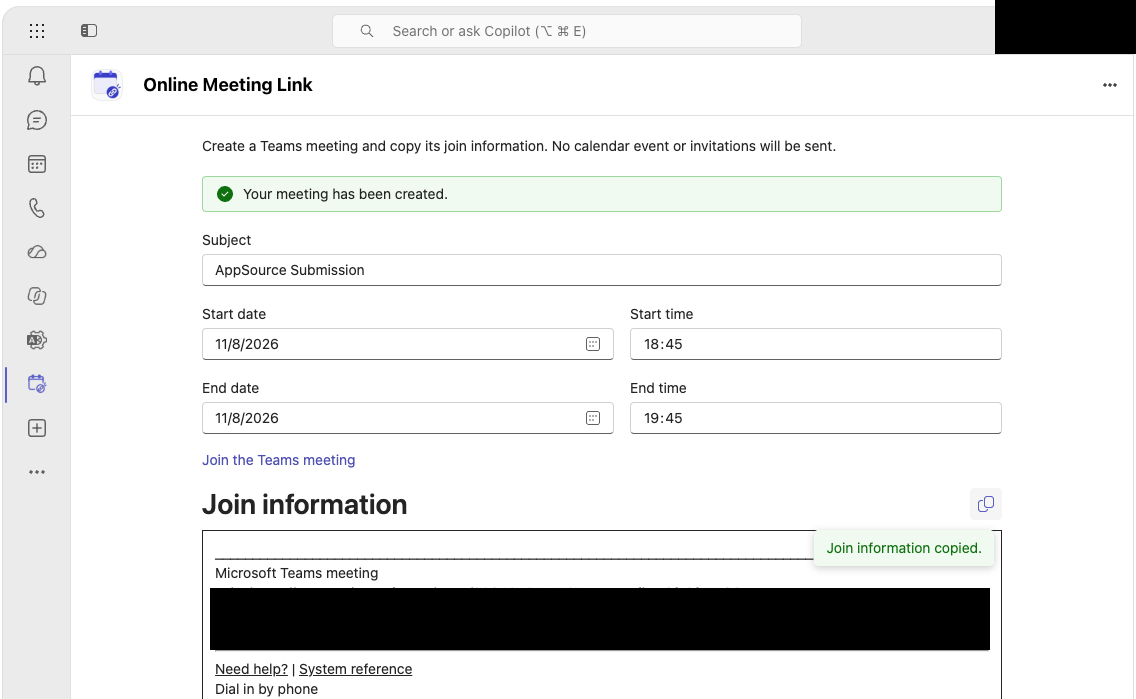
The confirmation indicates that the join information was copied.
If copying is blocked, the app shows a message and may provide a text field for manual selection and copying. If only the link is available, copy and share that link. Do not invent or add missing access details.
Teams appearance
The app follows the light, dark, or high-contrast theme selected in Teams. Creating a meeting and copying its join information work the same way in each theme. Administrator branding does not change this theme selection.
Dark
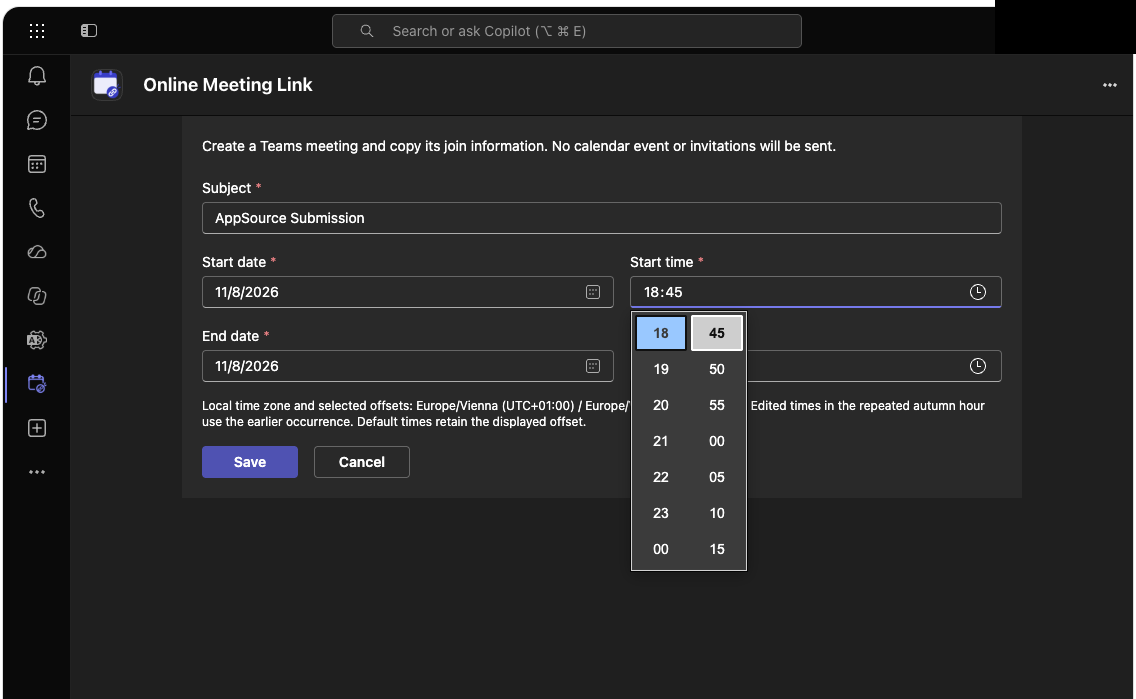
Create a meeting in the dark theme.
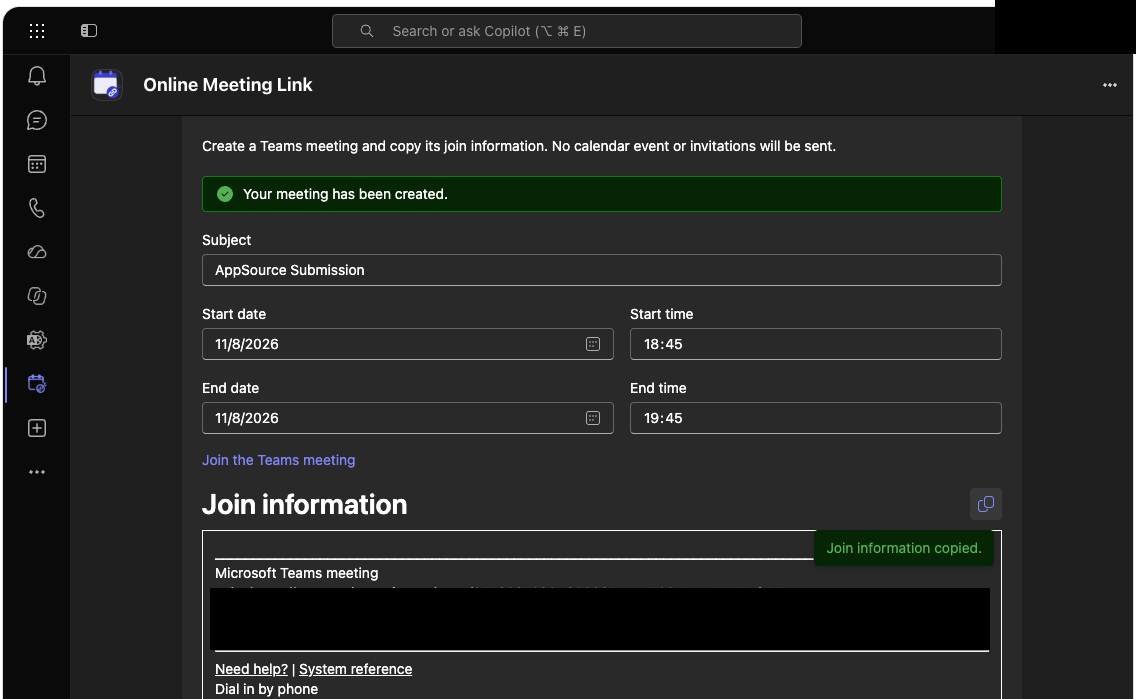
Copy join information in the dark theme.
High contrast
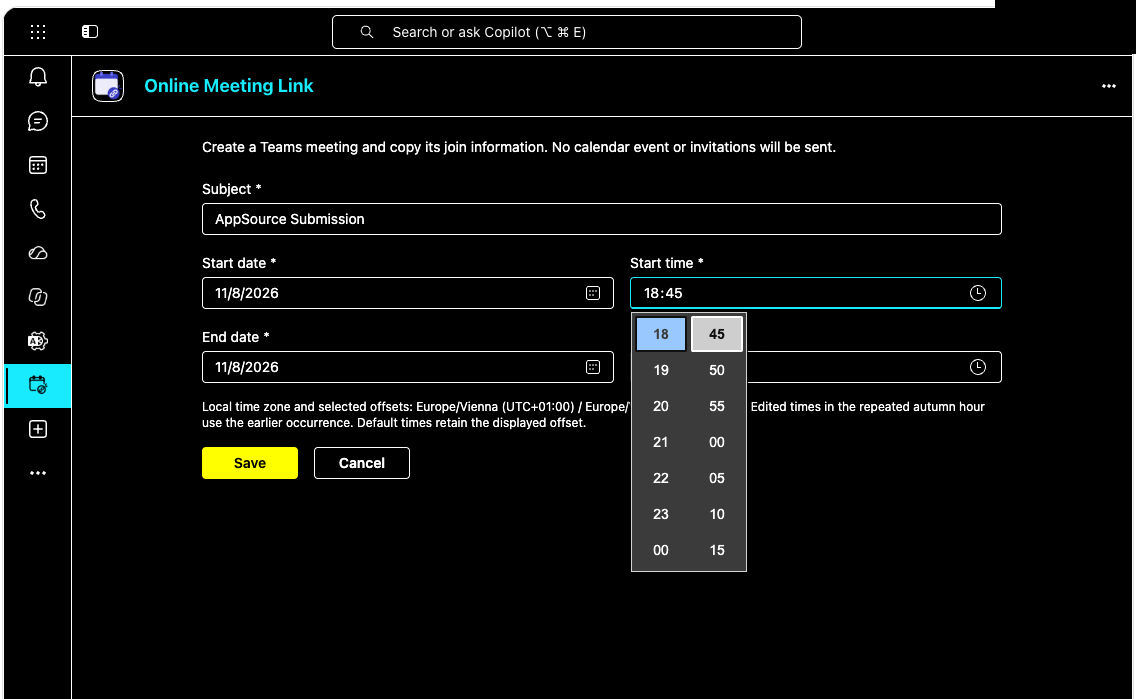
Create a meeting in the high-contrast theme.
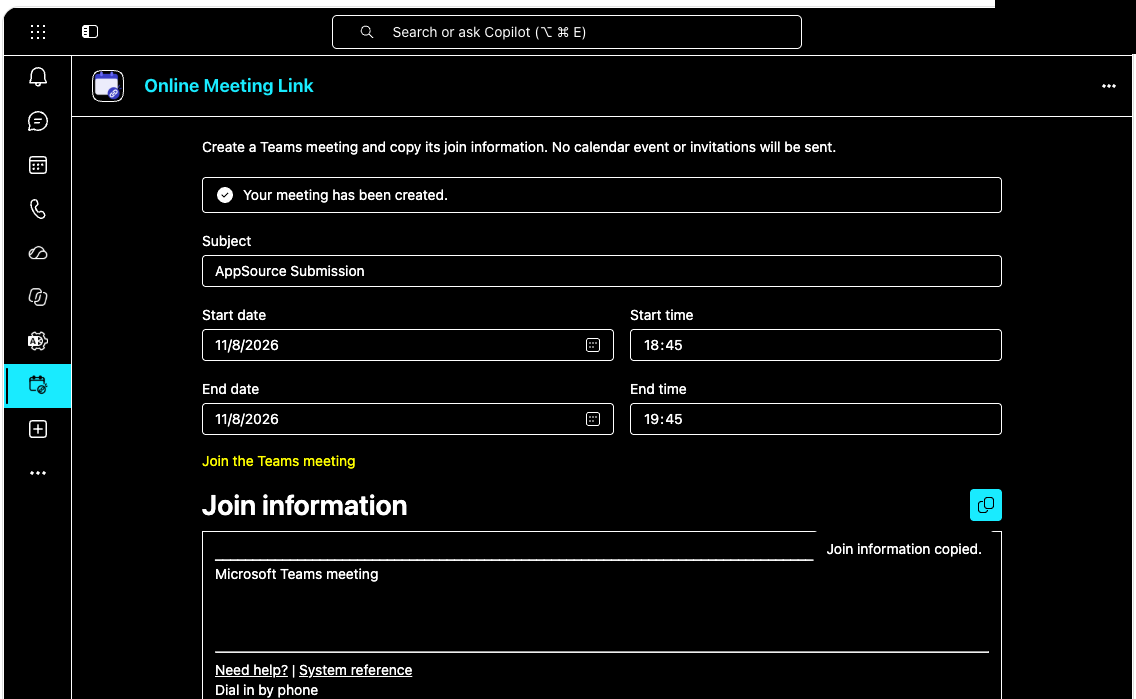
Copy join information in the high-contrast theme.
Reset the form
- Cancel discards the current entries and opens a fresh form.
- Create a new meeting returns to an empty form with newly calculated default times after a meeting has been created.
- Resetting the form does not delete a Teams meeting that was already created.
Troubleshooting and important notes
| Message or situation | What you can do |
|---|---|
| You do not have permission to create the meeting | Contact your Microsoft 365 administrator. They can check Graph approval, your account, license, and Teams policies. |
| Microsoft Graph rejects the request | Check the subject and times. If the problem continues, share the message with support or your administrator. |
| The outcome is uncertain after an error | The meeting may already have been created. Do not immediately try again: contact your administrator or support first to check whether it was created. A retry could create a duplicate. |
| Copying does not work | Use the manual copy option if offered, or select the displayed link. |
| The app cannot initialize | Reload the page. If the error persists, contact your administrator. |
The app does not permanently store form entries or displayed results in its own database. The created meeting and its availability remain subject to Microsoft 365 services and your organization’s policies.